
So you’re using saas•hapily to sync your Stripe to your HubSpot. You’re clearly the brains of the operation! But saas•hapily offers enough tools for your utility belt to make even Batman jealous. So let’s tackle two of them right now and make them easier to understand: Hosted Invoices and Payment Links.
Whats the difference between hosted invoices and payment links?
saas•hapily allows you to create both of these payment portals right within your CRM. But what’s the difference between the two?
A Hosted Invoice is something you send to only one contact. If the contact has a payment method already on file, the invoice page will auto fill the details for his or her convenience.
A Payment Link is a bit more casual. Don’t worry! You’ll still get your money this way. It can just be sent to multiple people. It safely accomplishes this by creating a guest checkout in Stripe. No critical details are auto filled so anyone who receives the link can make a payment.
But now that we know who’s who, how do we create them? I’m happy to say it’s simple and easy! Just the way we like it.
How do you create a Hosted Invoice?
Your customer would rather be the sole viewer huh? Safety first! We get it. To create a hosted invoice:
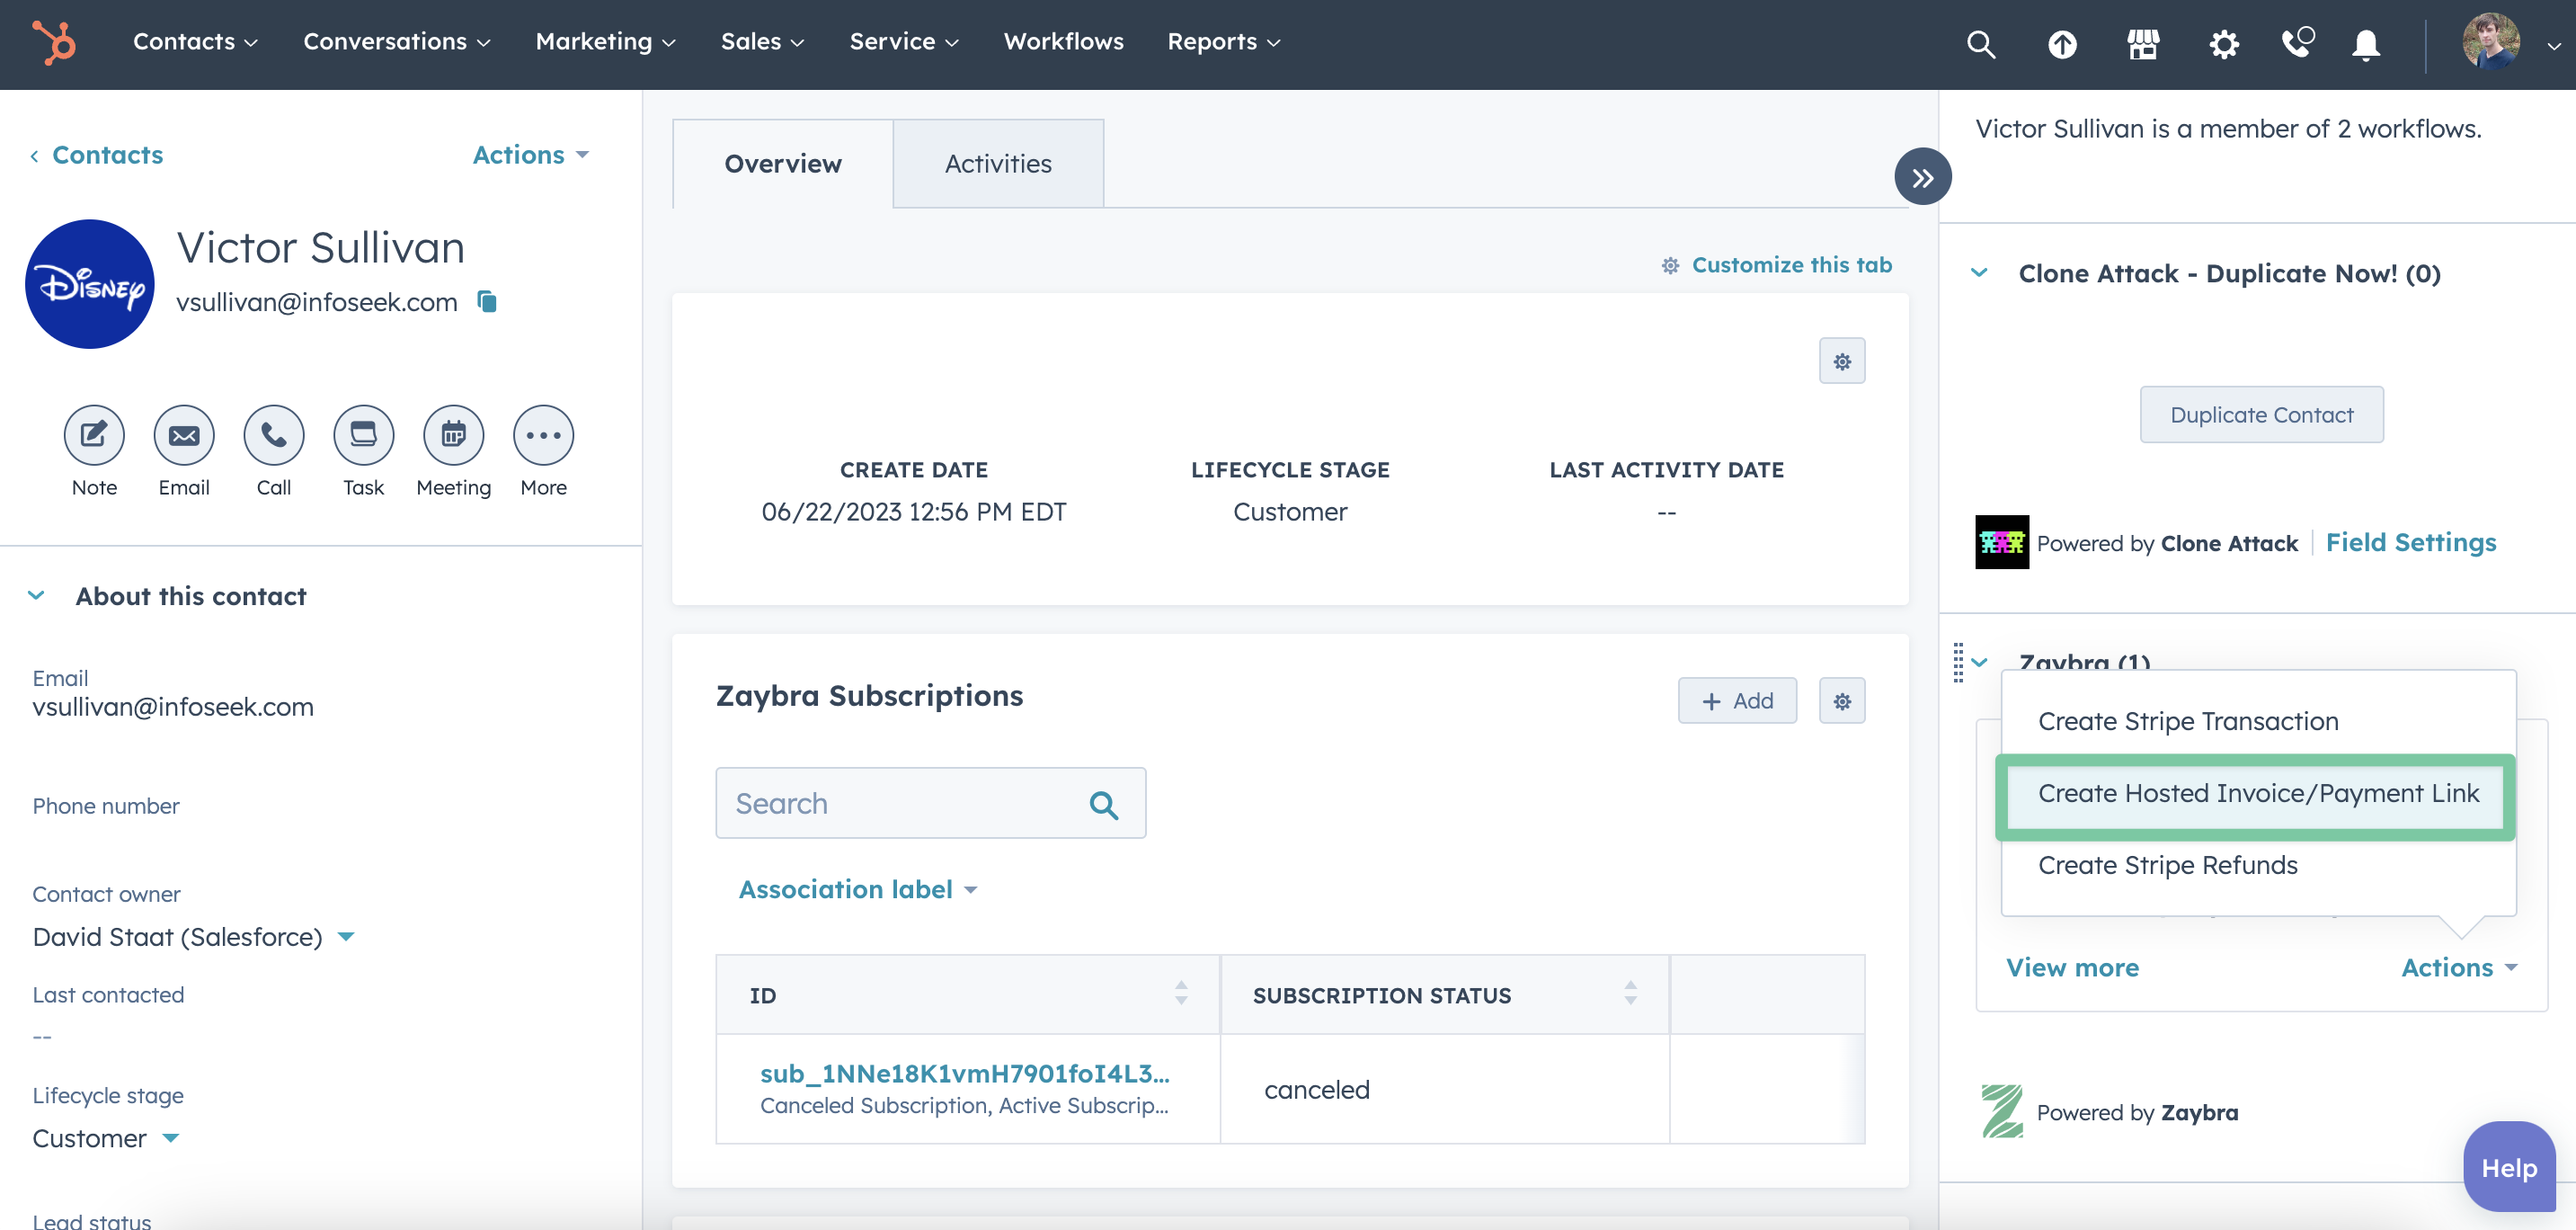
1. Start by opening up your customer’s contact record. For this example I’m using the totally not a fictional character, Victor Sullivan.
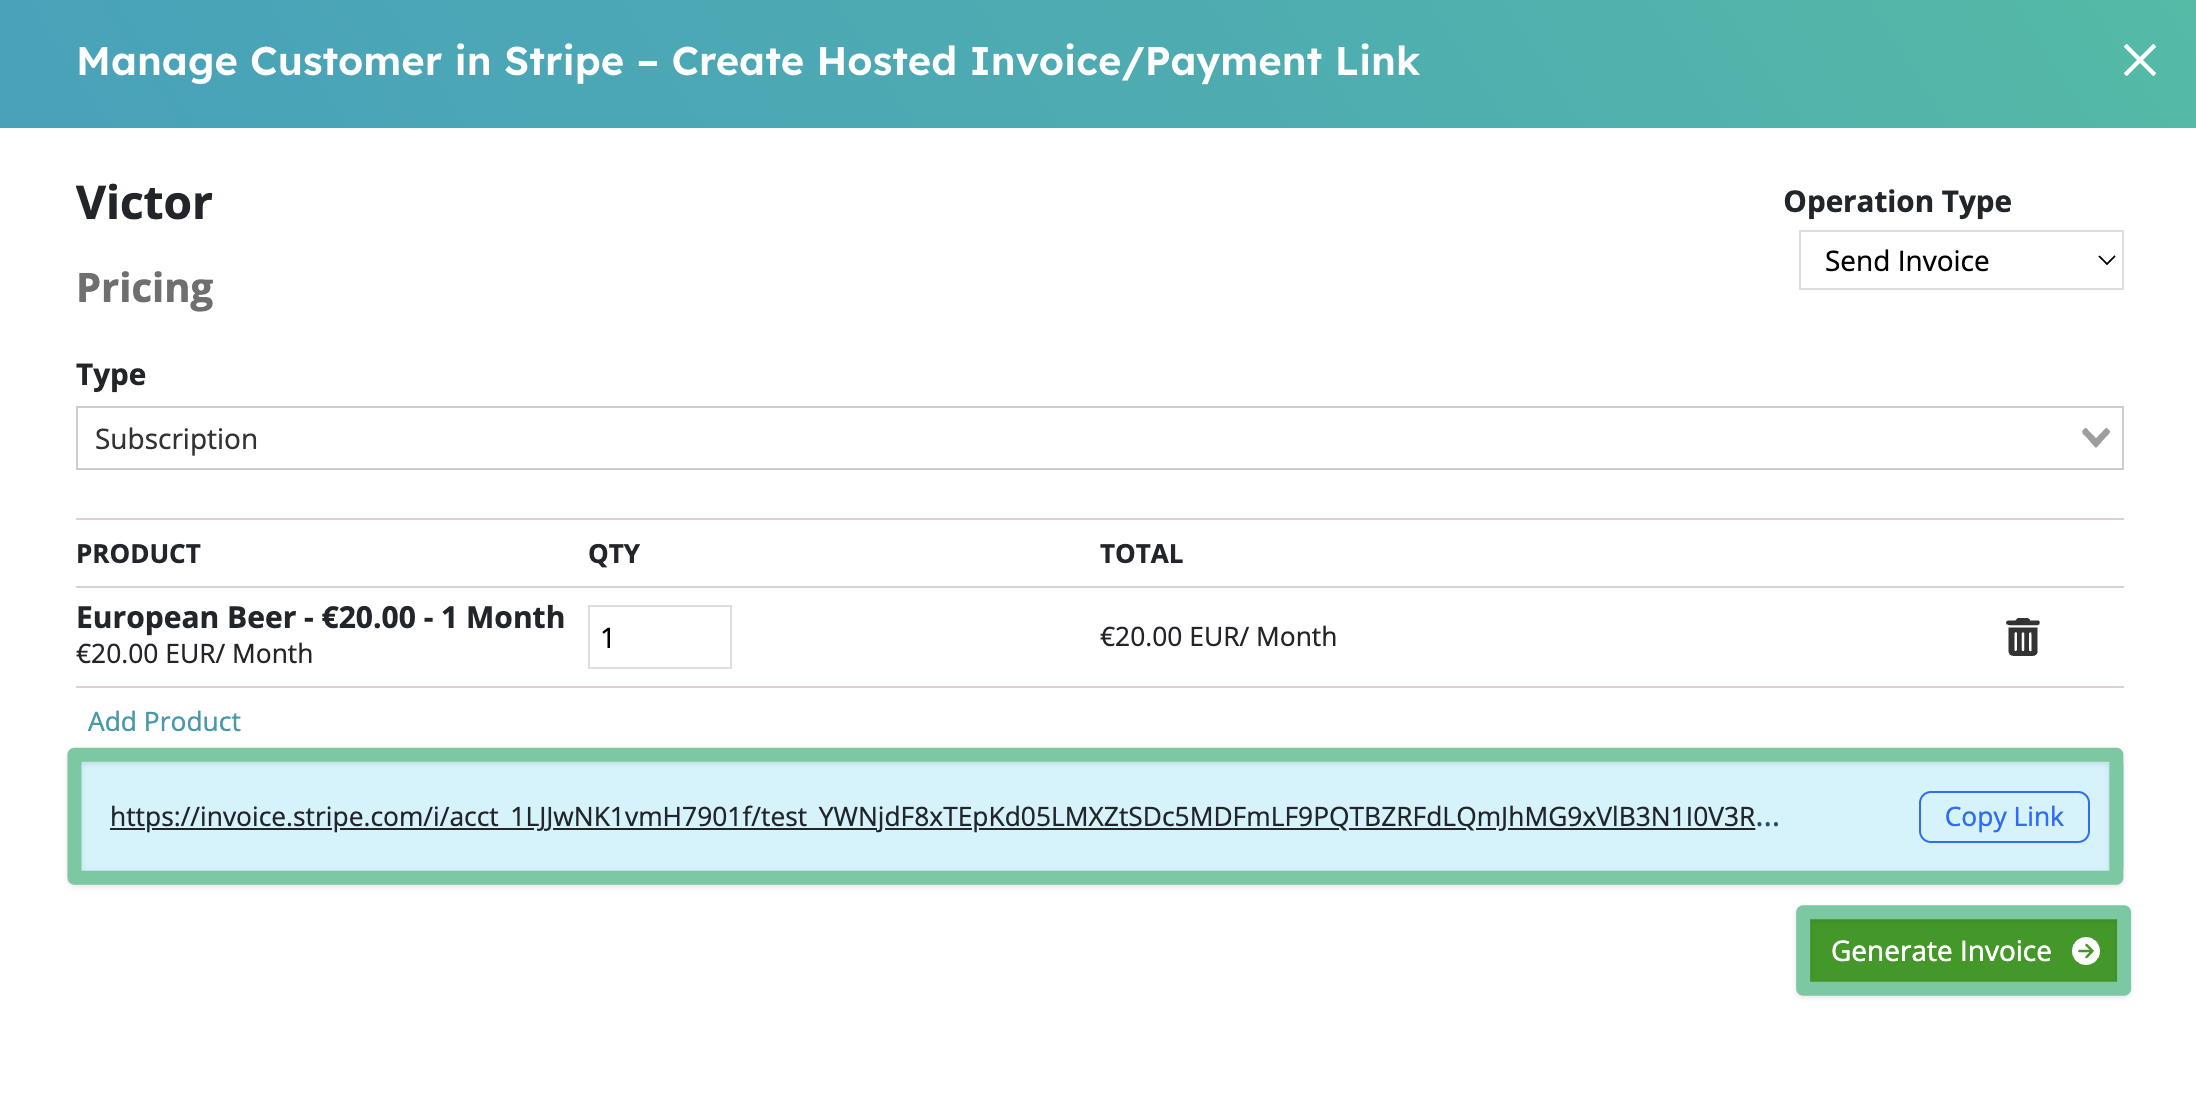
2. On the right hand sidebar, scroll down until you see the saas•hapily CRM card. Click Actions and then Create Hosted Invoice / Payment Link. This will open up the Manage Customer in Stripe window.
3. By default, this window will be set to create a payment link. To change that, simply click the dropdown box under Operation Type and select Send Invoice.
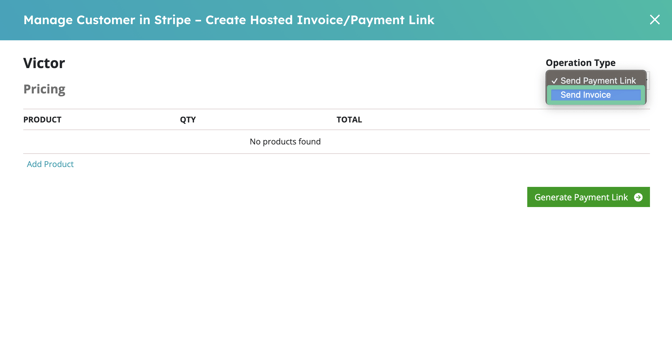
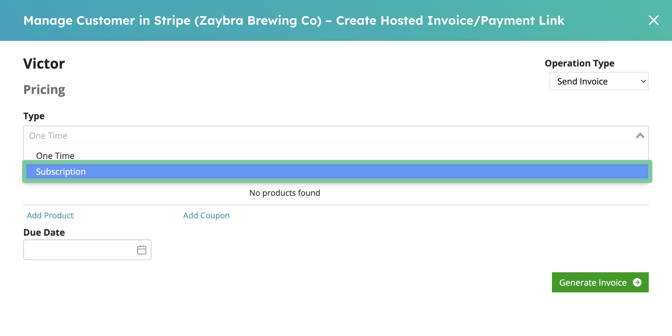
4. From here, you’ll want to select the Type of payment. This is basically used for determining if it will be a One Time payment or a recurring Subscription. Either one will work. But if you pick Subscription, a subscription card will be created for it in the CRM.
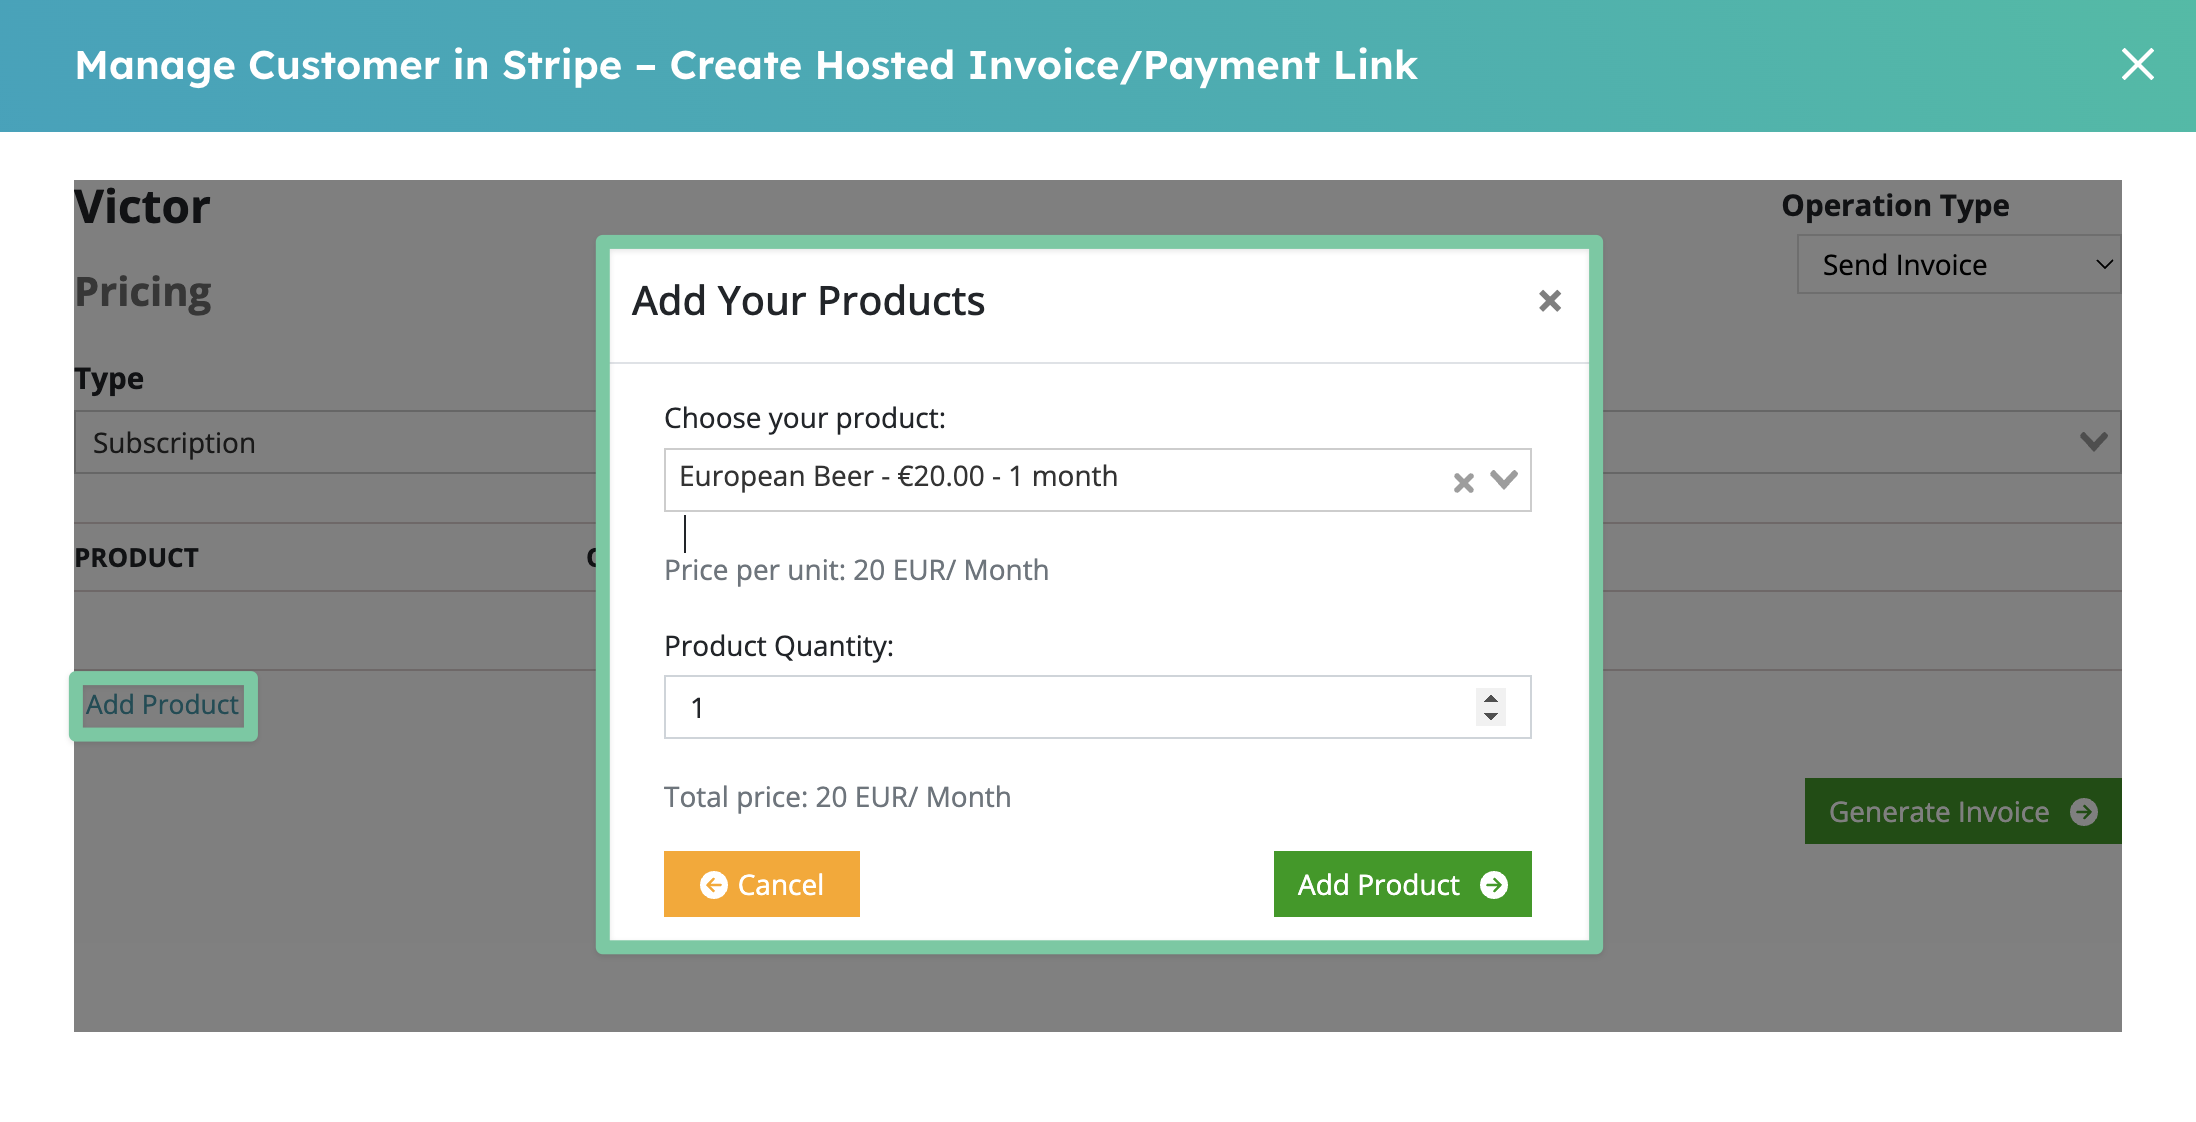
5. Click Add Product and select the product and quantity you want to add to the invoice. Then select Add Product.
6. If you're creating an invoice for a one-time product, you can set the due date for the invoice using the Due Date field!

7. Once you’ve added all the desired products, click Generate Invoice.
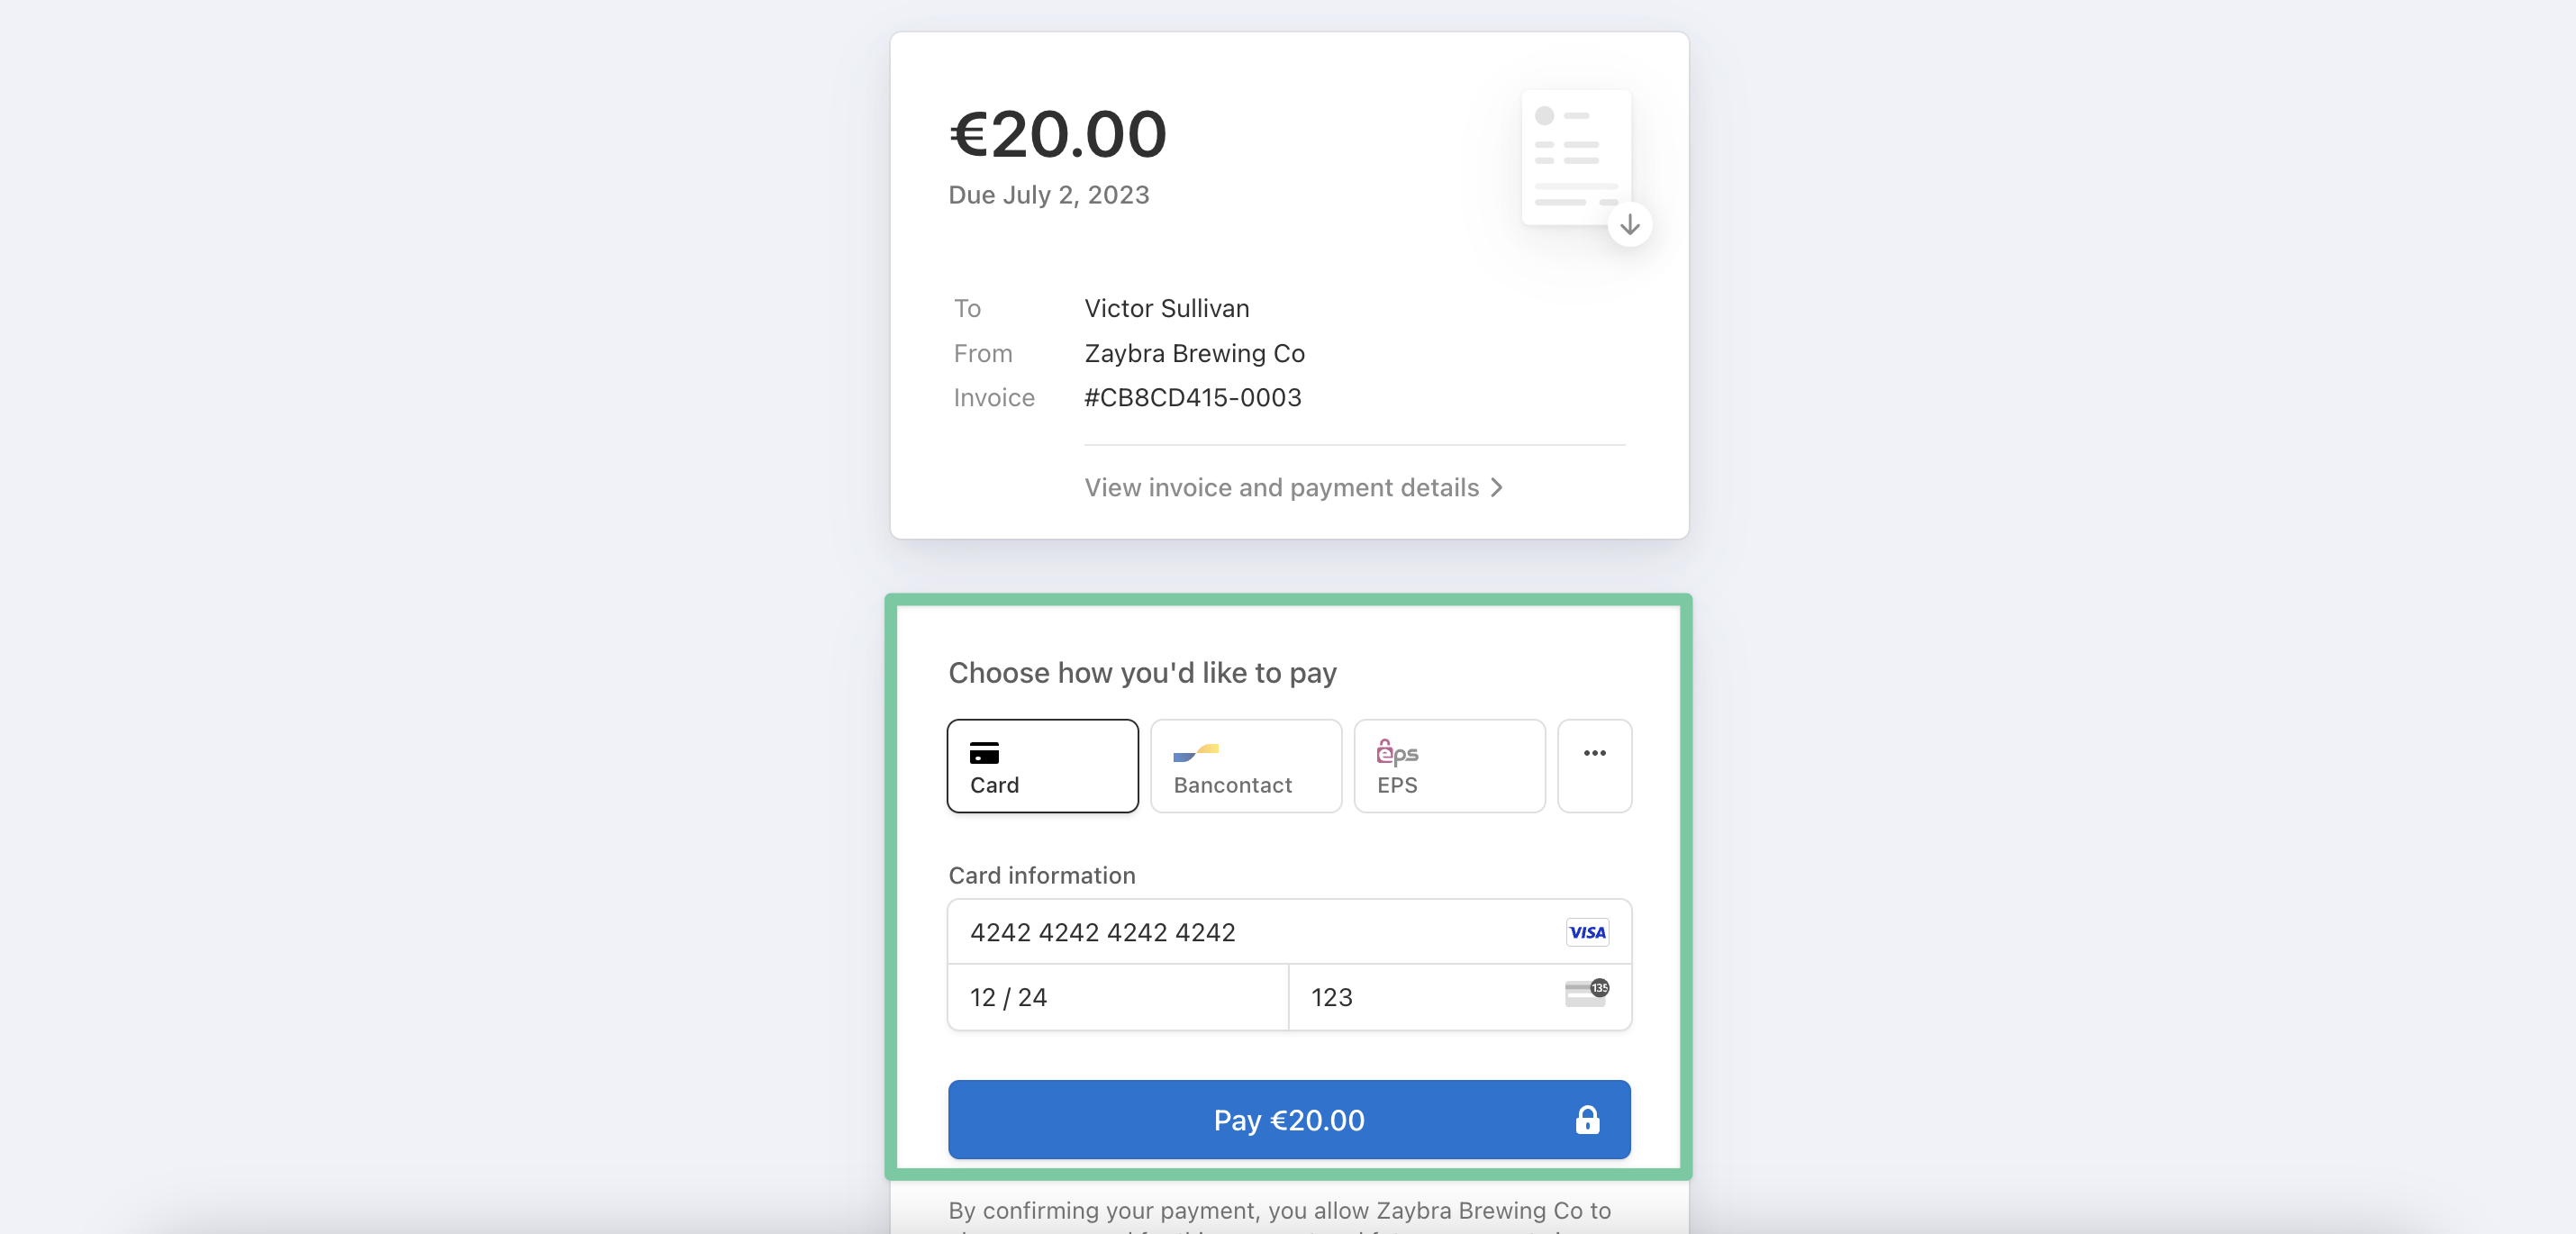
And voila! Now you can copy the invoice link and send it off. If we visit this test invoice page, we can see that Victor’s payment info is already filled in for him.
Let's say for a moment you need to resend the invoice link to your customer. Maybe it expires or it just got lost in the mail. What do you do?
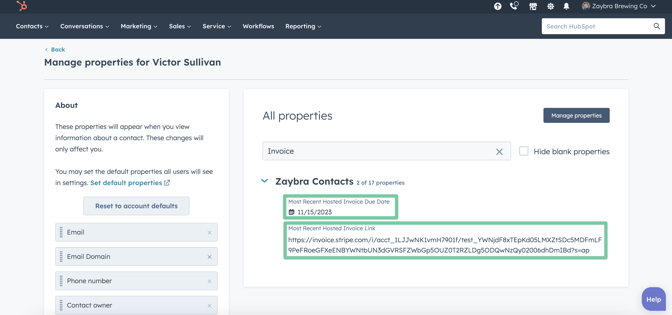
No worries! You can find the most recent invoice link you created along with its due date in the contact's properties. Just search for either Most Recent Hosted Invoice Link or Most Recent Hosted Invoice Due Date.
How do you create a Payment Link?
Payment links allow for multiple people to view and pay the invoice! That means you get your money faster. Creating one is almost exactly the same as creating a Hosted Invoice minus a few steps.
1. Open up your customer’s contact record and scroll down to the saas•hapily CRM card.
2. Click Actions > Create Hosted Invoice / Payment Link.
3. Like I said before, the management window will set us up to create a payment link by default. So there’s no need to fiddle with the Operation Type box this time. Leave it set to Send Payment Link.
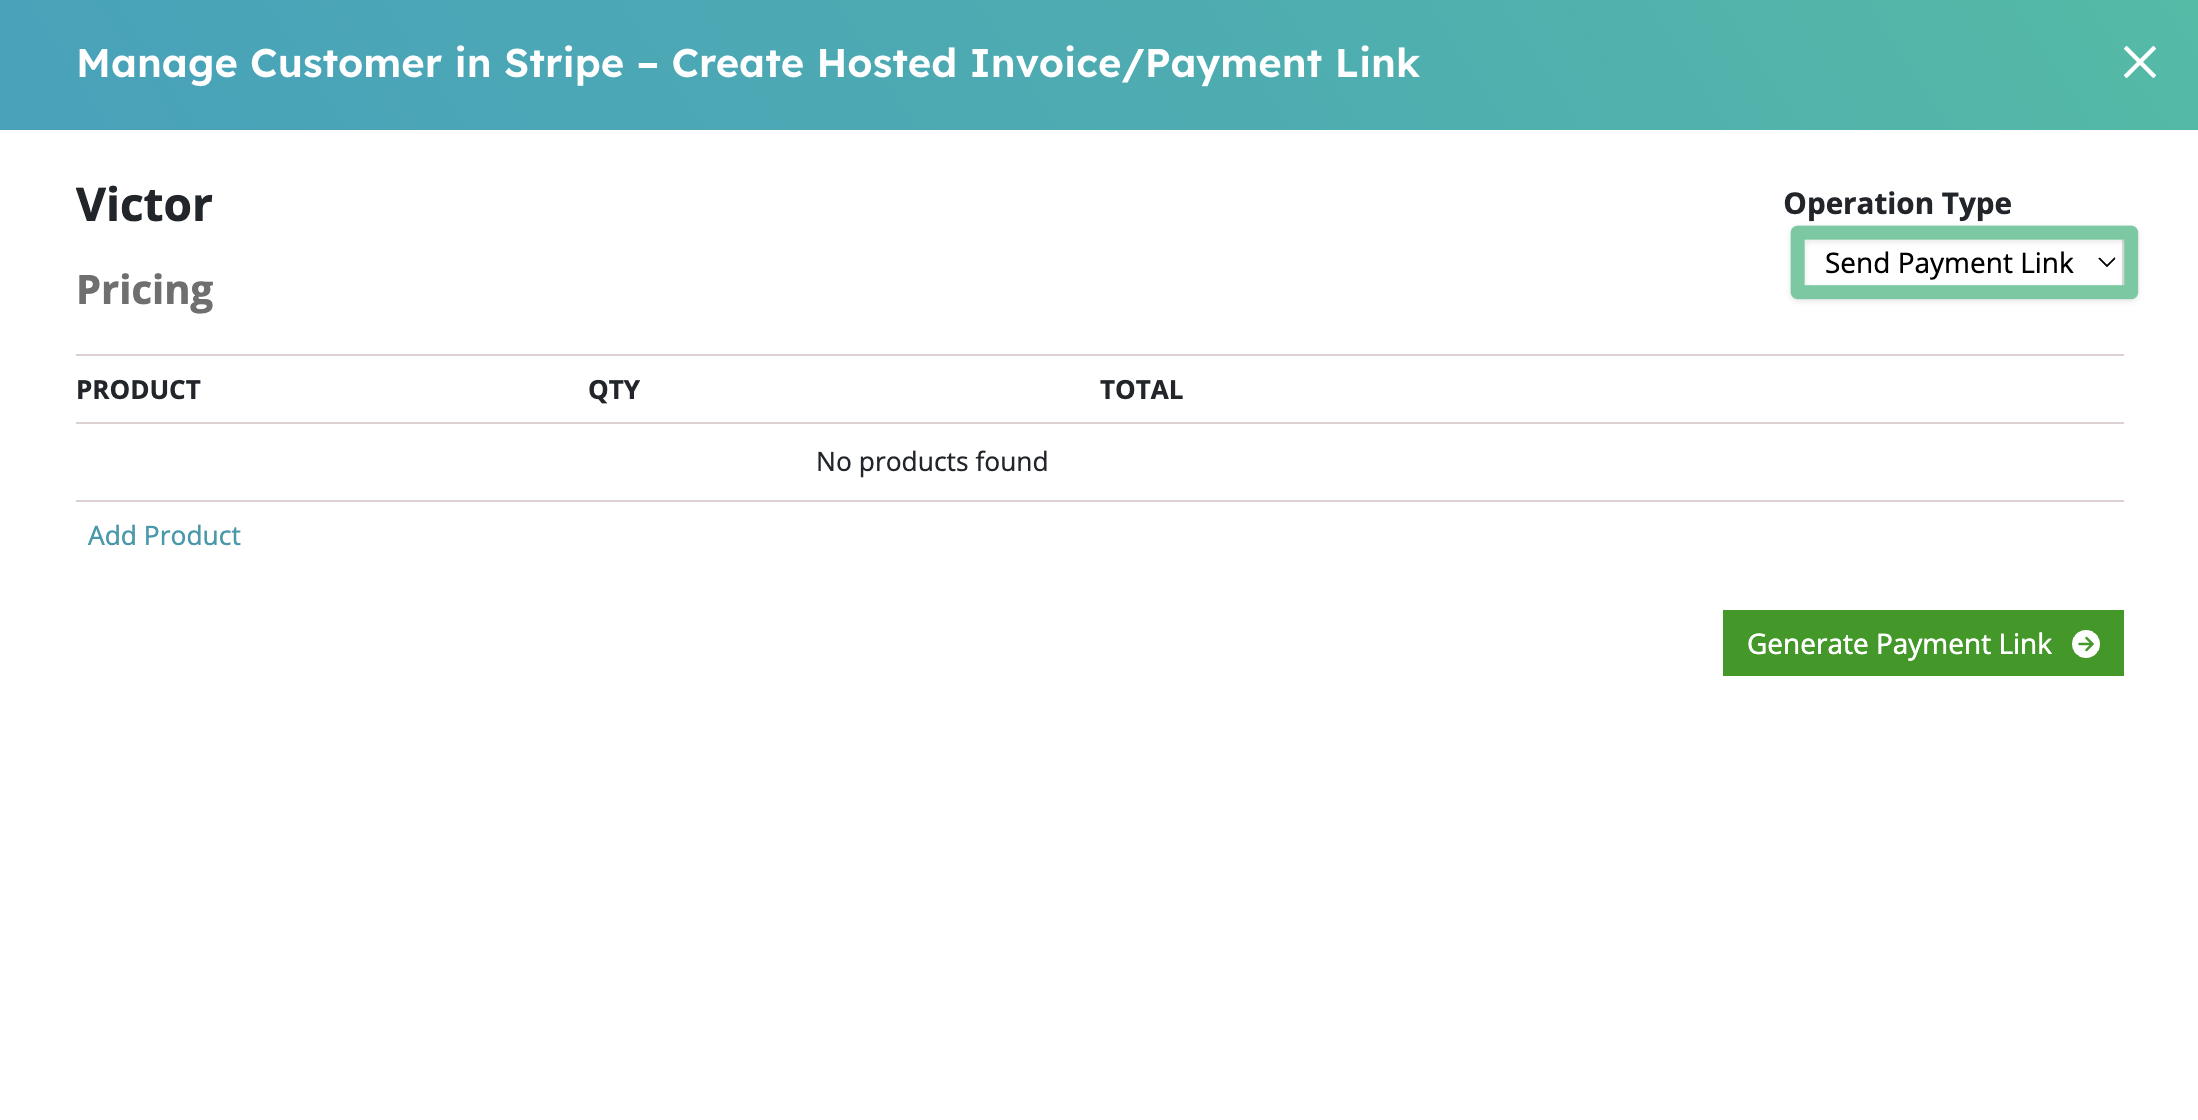
4. Click Add Product, select the product and quantity, and then click Add Product.
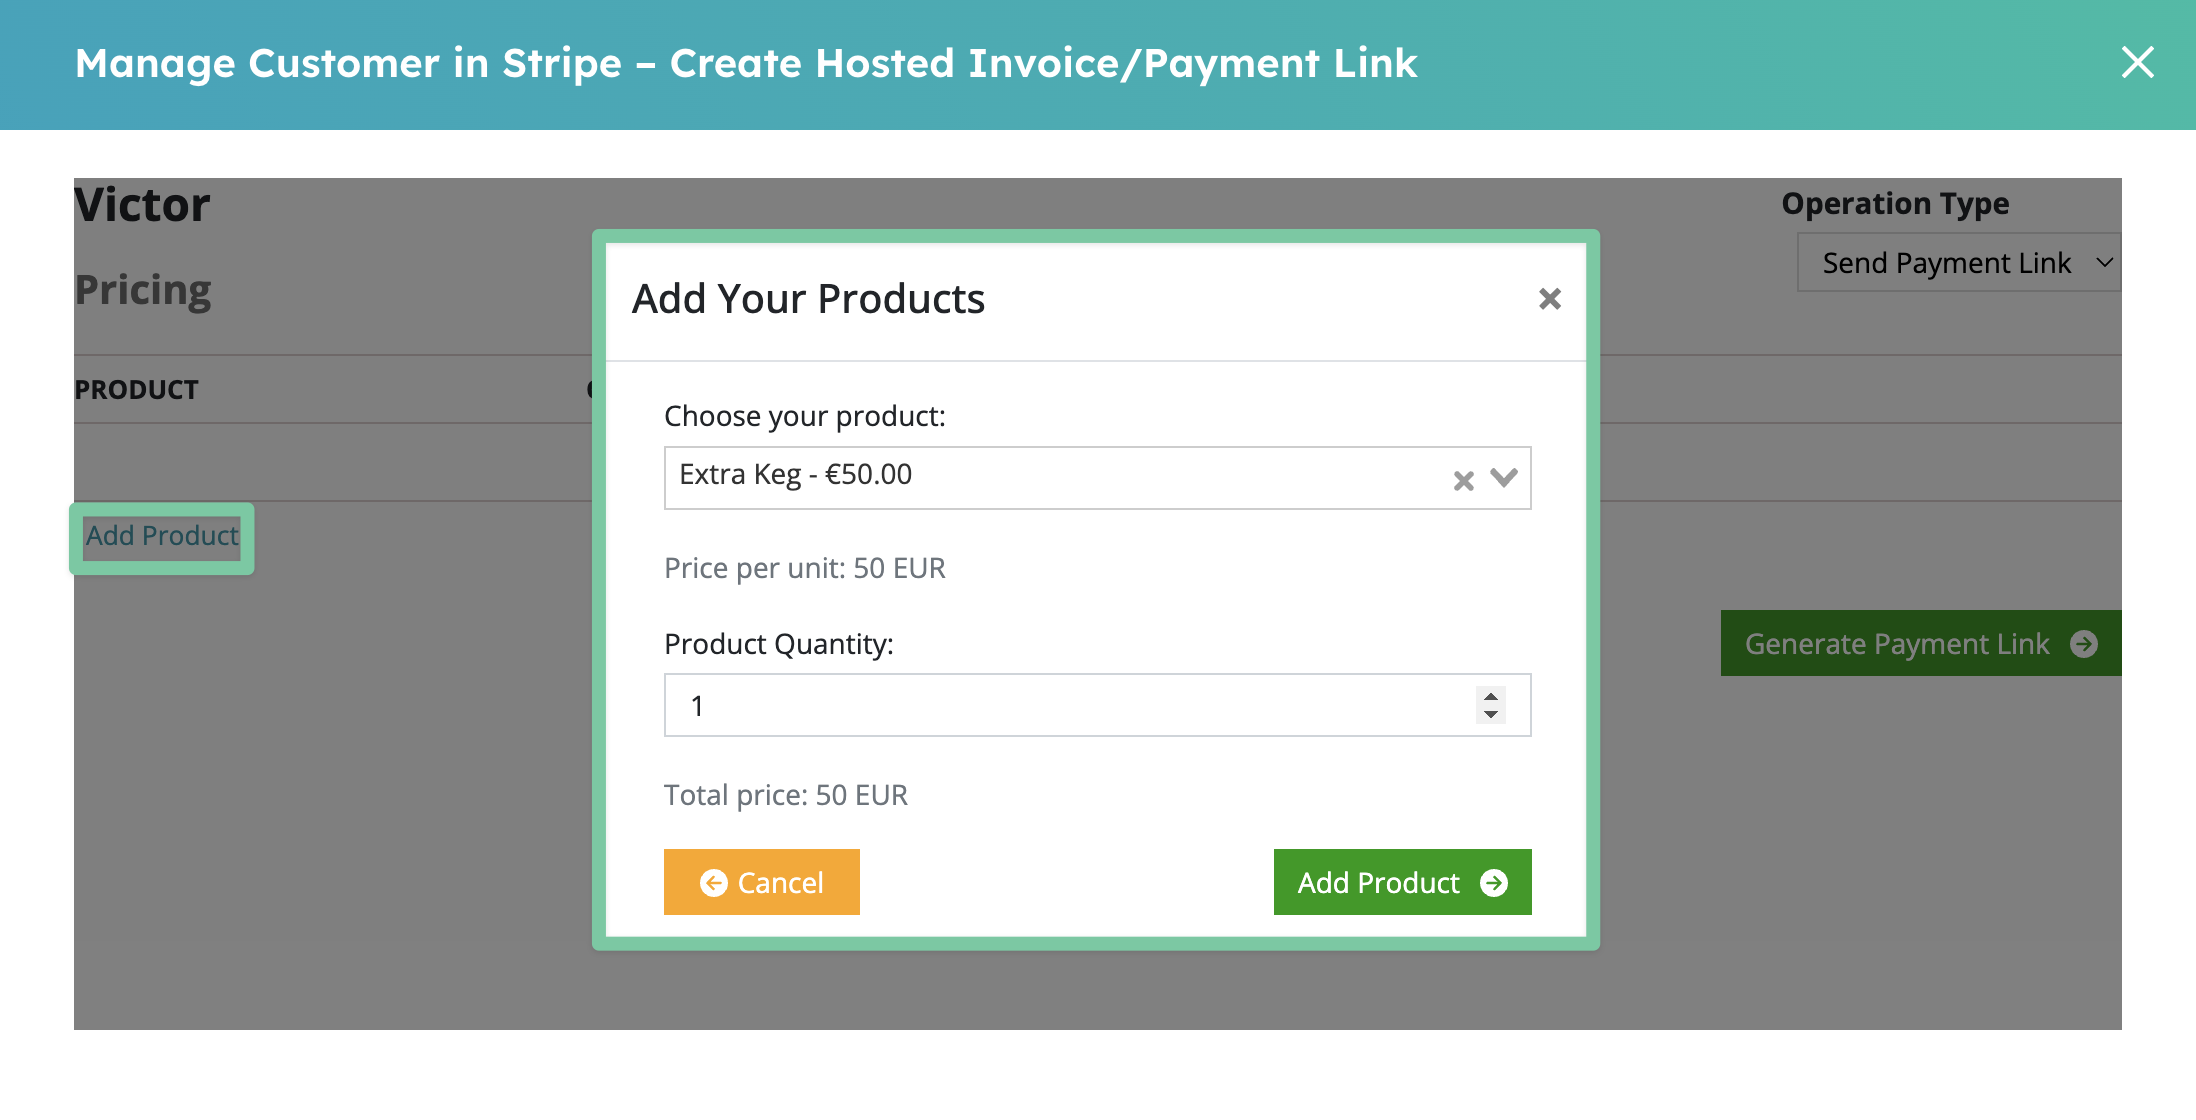
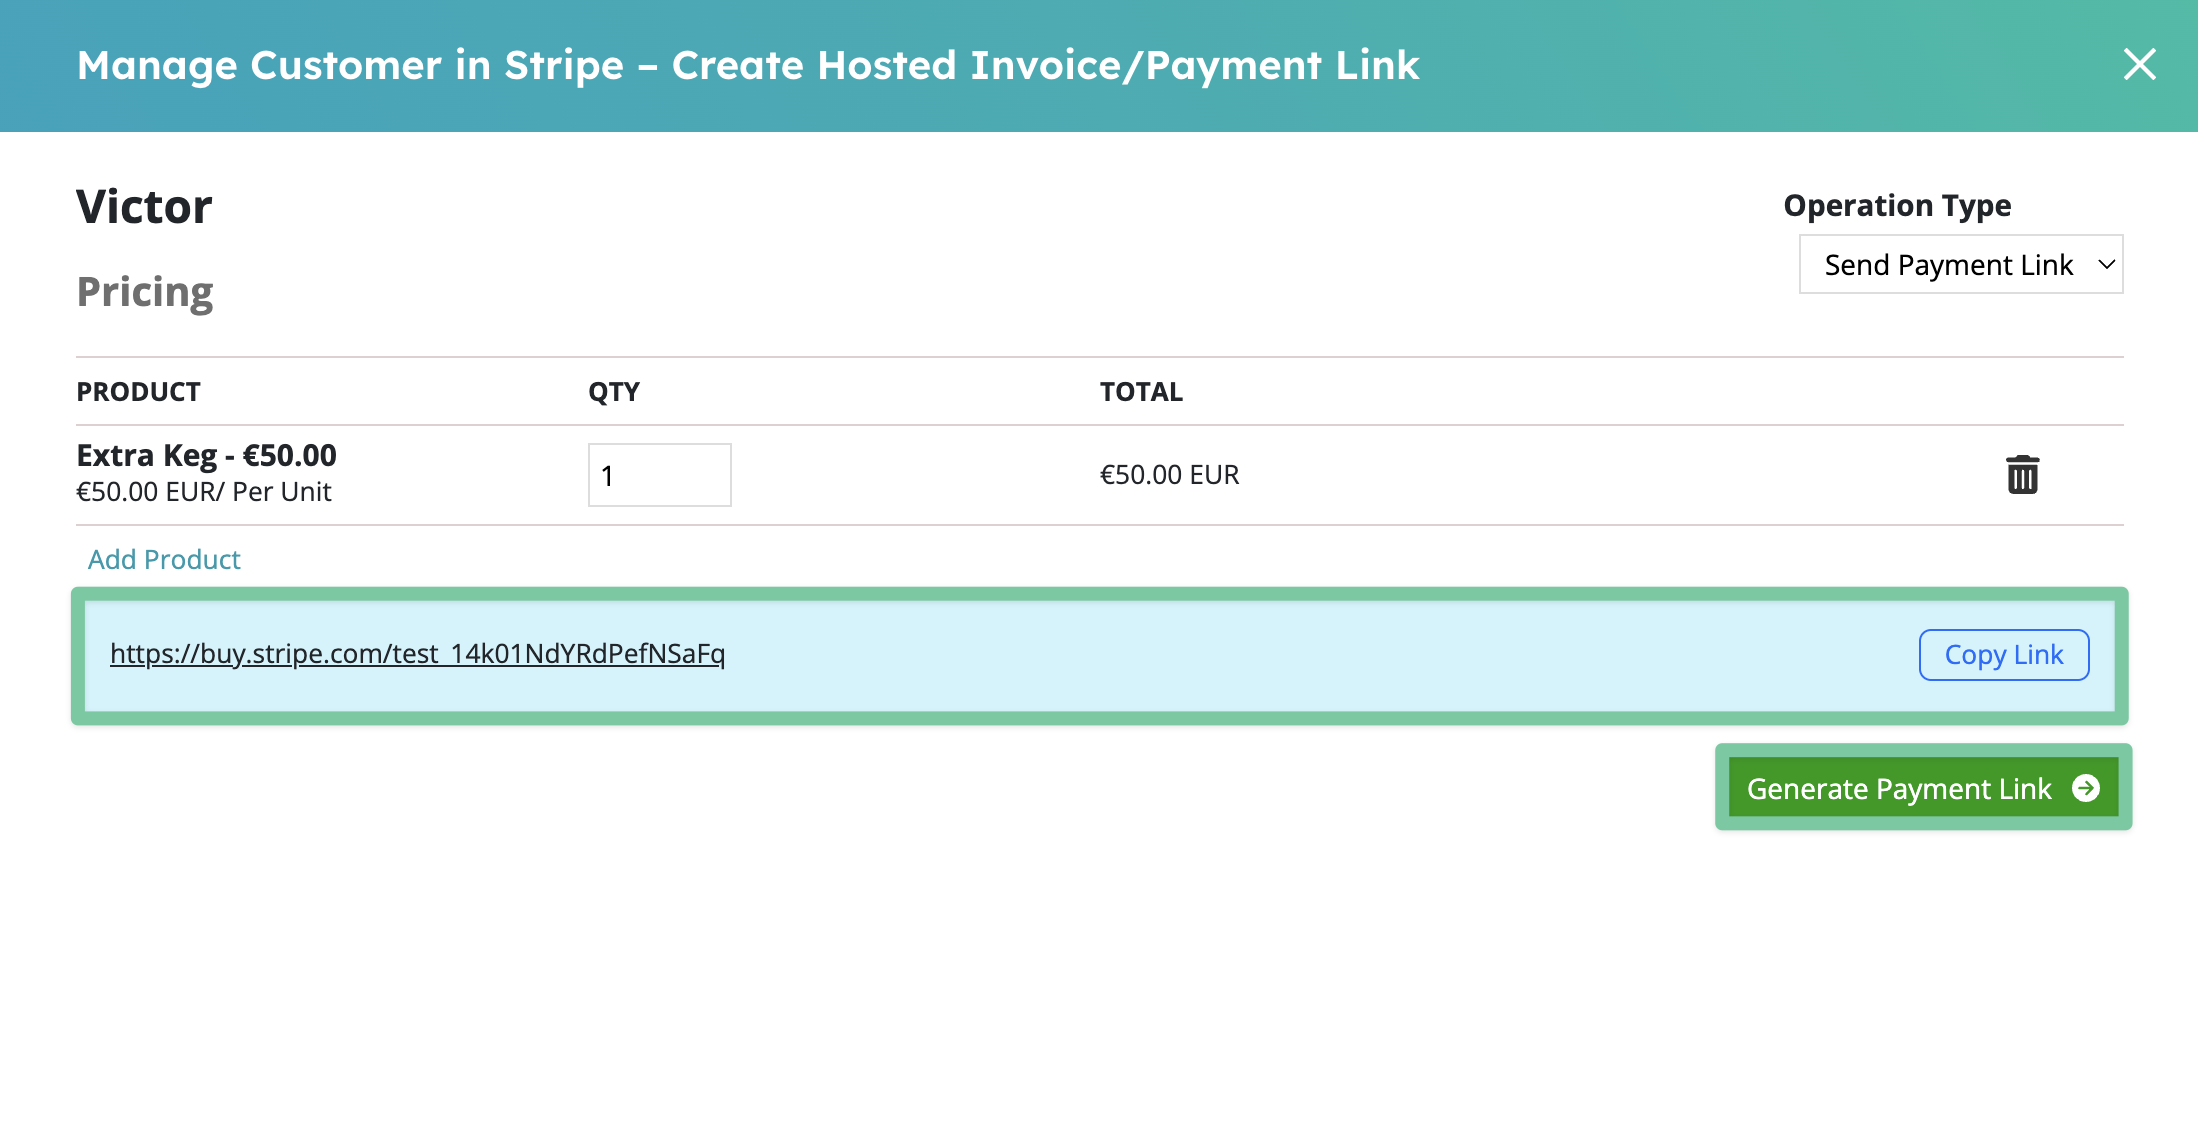
5. Once you’ve added all of the desired products, click Generate Payment Link.
6. All done! Now you can copy and send the link to as many people as you like (preferably those who work with our pal Victor).
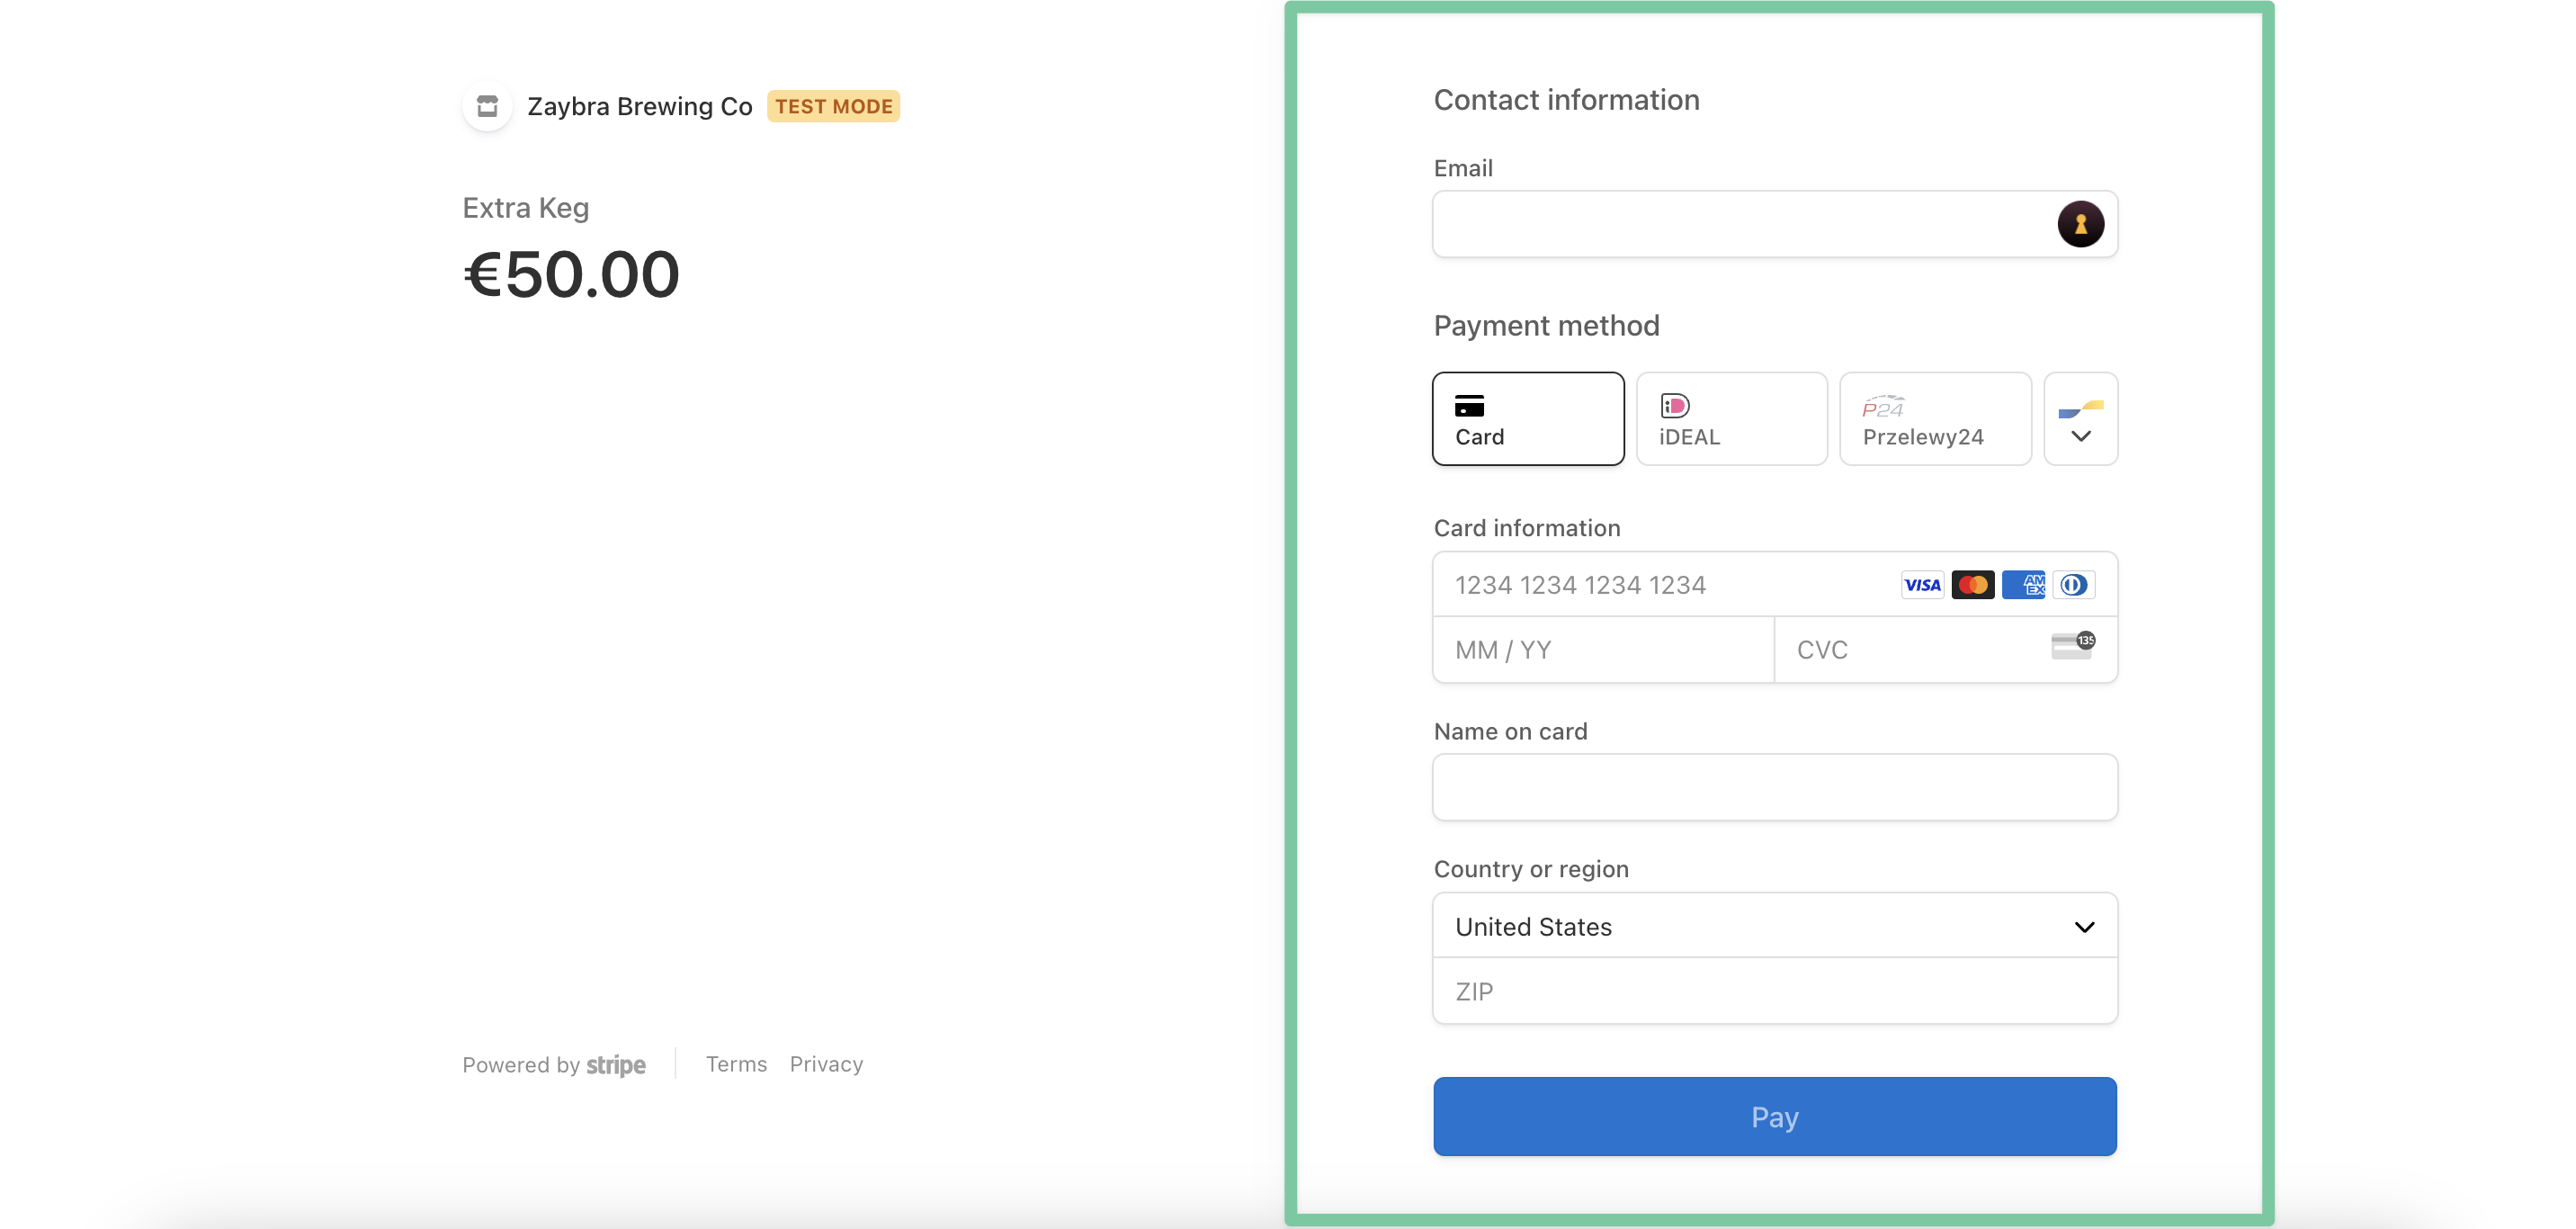
7. If we check the link, we'll be taken to Stripe's guest checkout. As you can see, no payment info is filled in:
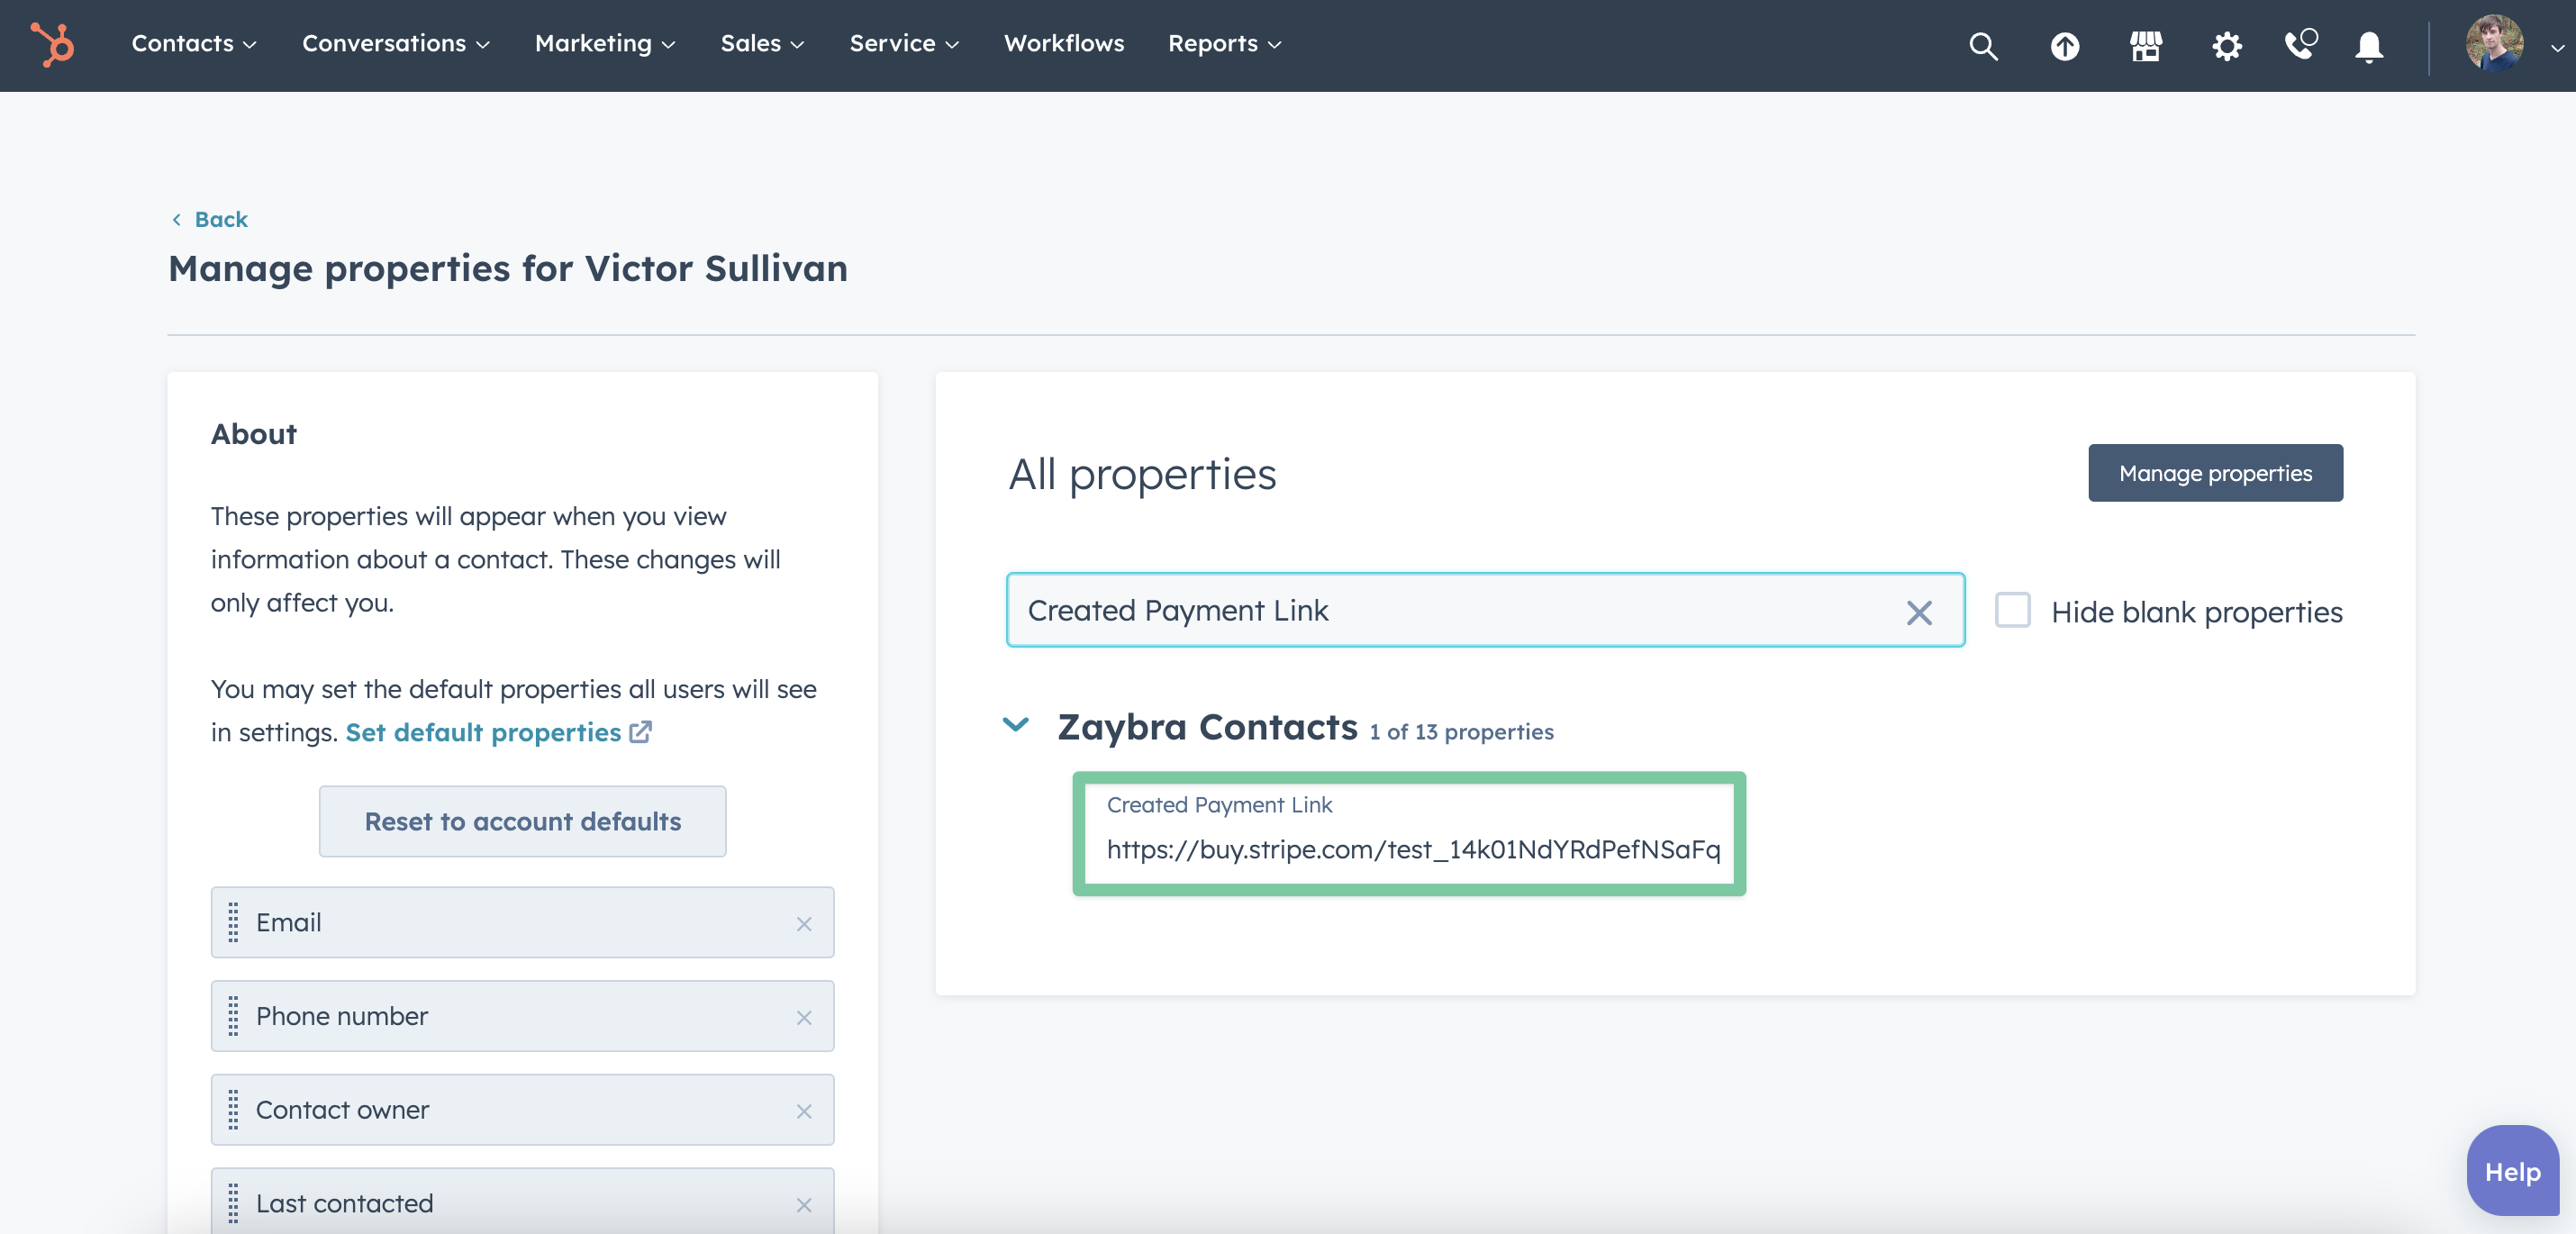
8. Bonus step! If you ever need to access this link again, saas•hapily will fill it out under the Contact’s Created Payment Link property. So don’t worry if you accidentally lose it.
Now you’re all set! Create as many links as you like. No headaches, no tedium, no problem!
Isn’t that better?
Want to see what else the app can do? Check out this blog post on Updating Association Labels for saas•hapily Subscriptions!